

This collection of gardening and landscaping handy hints will give you effective new techniques to get the beautiful garden and backyard you’ve always wanted.
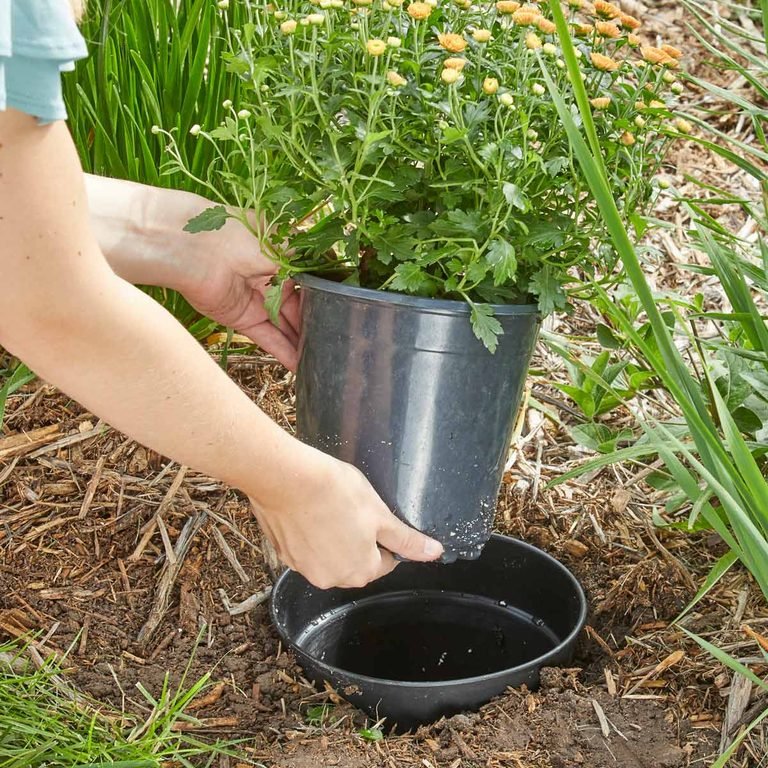
Plant-in-a-Pot Landscaping Design
Ever wish you could reorganize your garden after seeing how the mature plants look? Here’s a clever way to do it. You’ll need a bunch of pots of the same size, so they’ll nest in each other. Put your plants in doubled pots, and then bury them at ground level. Whenever you want a change, lift out the top pot and put in a different one. This method is also really slick for bringing plants indoors over the winter. This method is great for quickly changing out seasonal plants, and allows for easy experimentation with color and placement of plants and flowers.

Outdoor Handy Hints
These handy hints make everything in the great outdoors easier!
Saving Soil with Old Cans
For deep planters, fill the bottom with old cans and plant pots. The cans and pots improve drainage and create air pockets for better aeration and healthier soil.
Check out these Lawn and Yard Maintenance and Gardening Tips. Our experts weigh in with their best tips ever about how to get a healthy and beautiful lawn and garden.
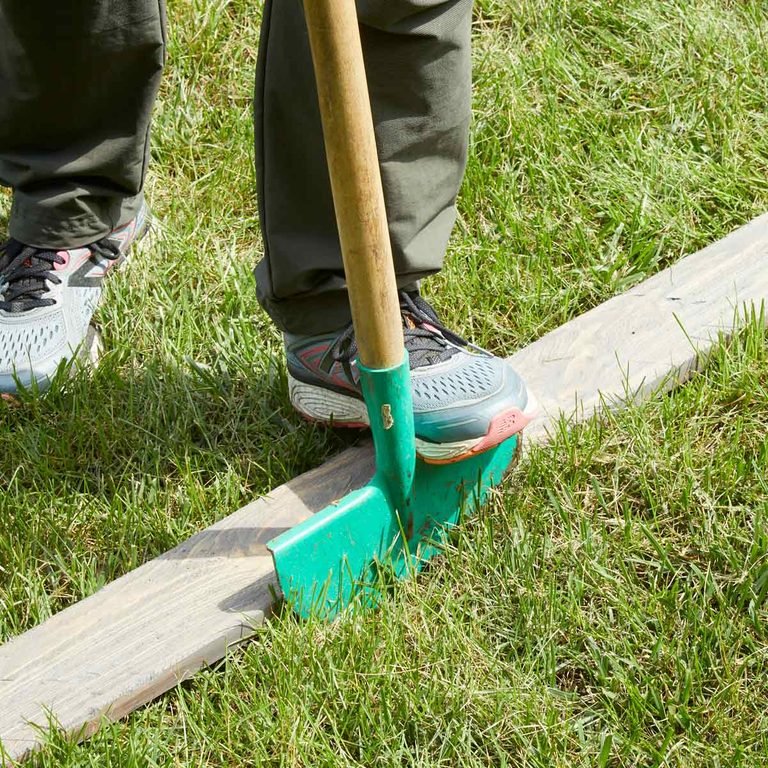
Simple Lawn Edging
To edge your lawn, garden, or flowerbed, lay down a 2×6. While holding the board with your foot, drive a flat spade along the board’s edge. Move the board as needed to create a clean, straight line.
Check out these 23 Yard Tool Hacks That’ll Make Your Life Easier. These simple and smart updates to everyday yard tools will make your outdoor chores a heck of a lot easier this season.
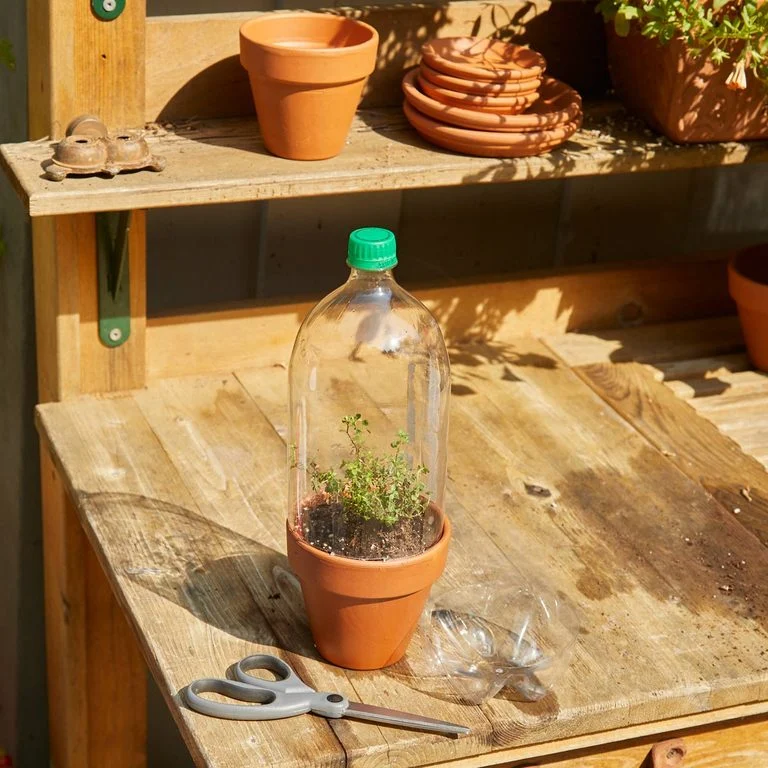
Micro Greenhouse
Do you have a hard time starting seeds or cuttings? Try soda bottle greenhouses. Cut the bottom off 2-liter soda bottles and remove the labels. Each seed gets its own micro greenhouse! Remove the greenhouses once the seeds have germinated and cuttings are rooted.
Plus, check out these 10 Creative Home Hacks That Will Improve Your Life. These home hacks solve everyday problems with stuff you already have.
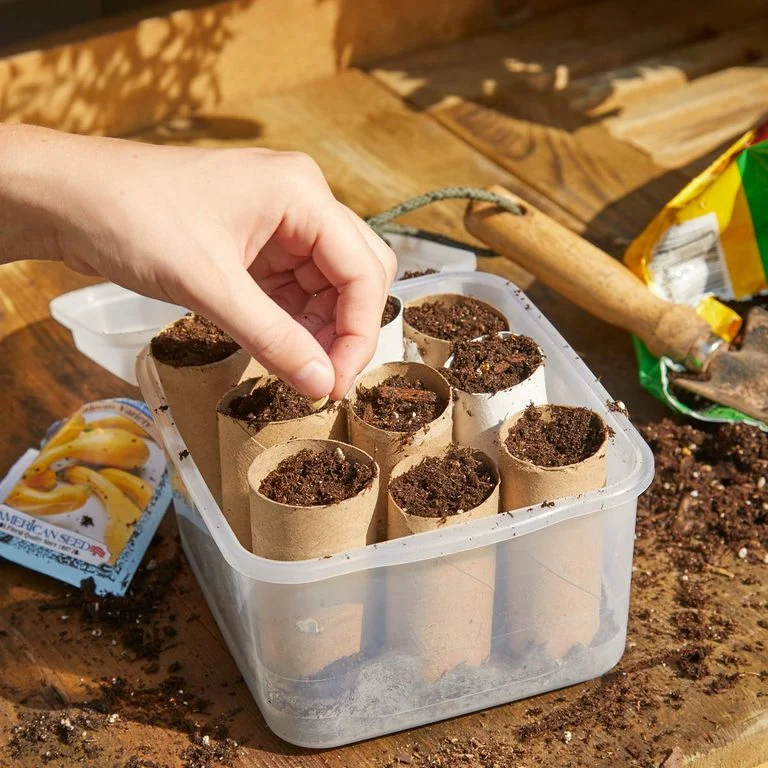
Cardboard Seed Tubes
For an easy and green way to start seeds, save your toilet paper and paper towel tubes. Cut the tubes into 2 in. lengths and set them in a waterproof tray. Fill the tubes with potting soil and plant your seeds. When the seedlings are ready to move to the garden, plant them right in their cardboard tube. The cardboard will decompose. Be sure to keep the tube below the soil surface, so it doesn’t wick moisture away from the roots.
Check out these 20 brilliant ways to use hangers, rubber bands and cardboard tubes around your home.
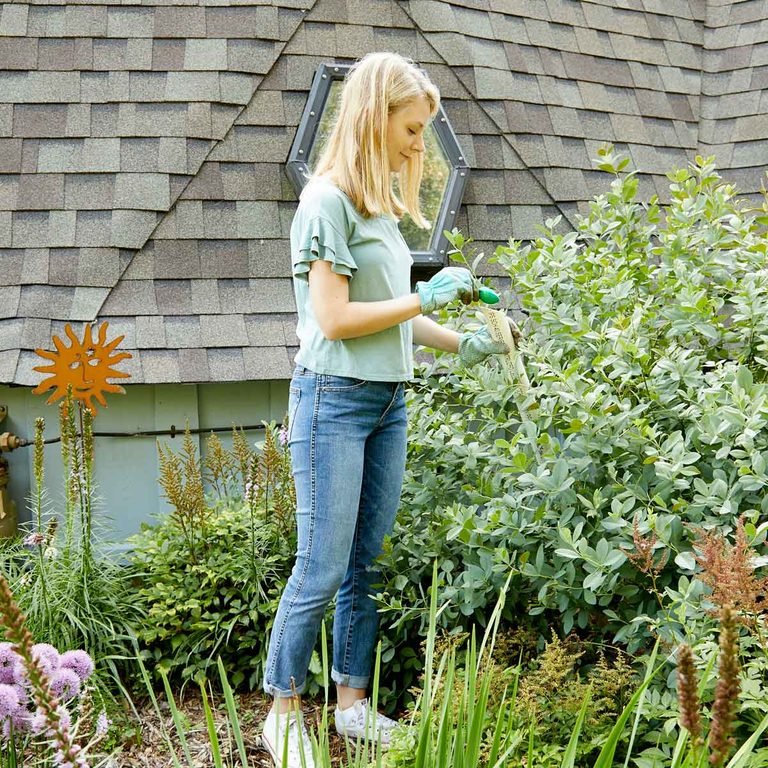
Fertilize Dense Plants
Fertilizing bushes or other dense plants requires getting the fertilizer to the base of the plant, so I use a length of 2″ PVC. Slide one end down to the plant base and pour the fertilizer into the pipe. Cut the top of the pipe at 45 degrees to give yourself a larger opening to pour in the fertilizer. – Gordon R. Watson
Check out these 10 Lawn Care Myths You Really Need To Stop Believing.
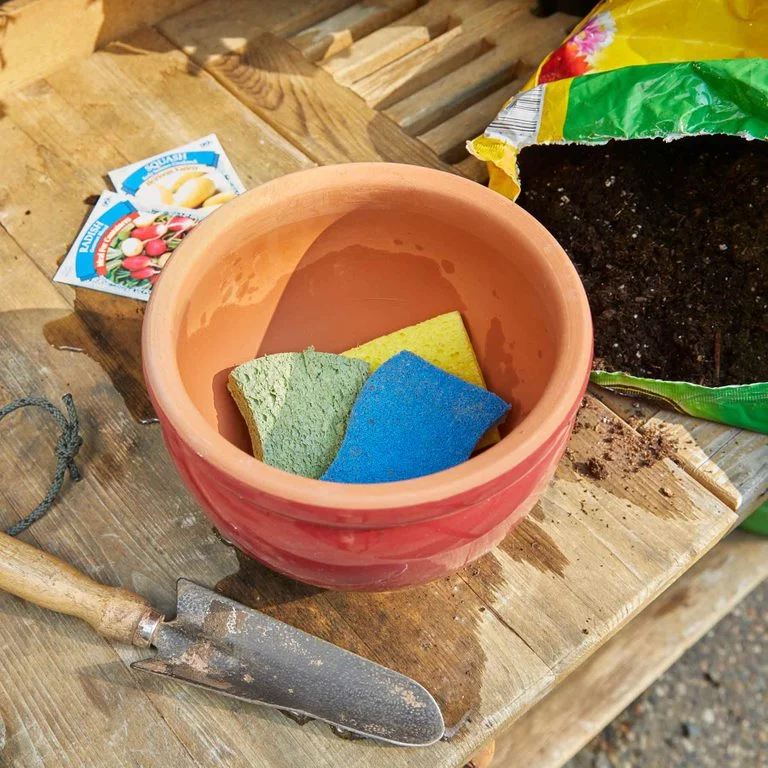
Healthy Plant Hydration
Water settling at the bottom of pots can lead to root rot. To combat this problem, cut up old sponges and put them in the bottom of the pot. The sponges retain moisture and create necessary air space. They also help prevent water from flushing out the bottom. The sponge acts as a water reserve and keeps soil moist longer.

The Penny Hoarder Issues “Urgent” Alert: 6 Companies Are Overcharging You
By The Penny Hoarder — How many times have we fallen for this?
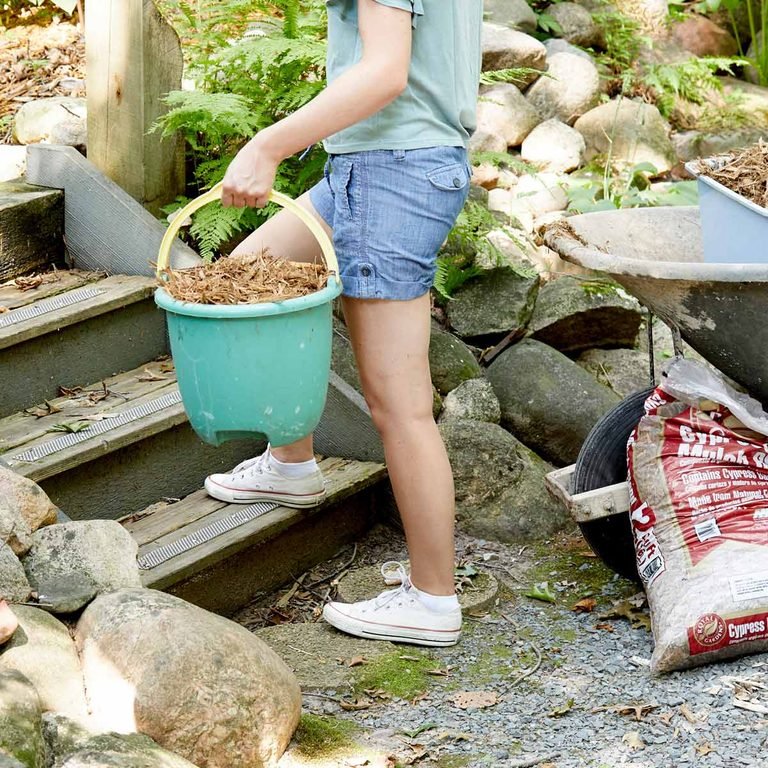
Easy Mulch Spreading
Getting mulch up close to flowers and bushes is easier if the mulch is in a small container. So I place buckets and pails in my wheelbarrow and fill them up with mulch. It doesn’t matter much if the mulch misses the bucket and lands in the wheelbarrow. Once you’re done dumping the buckets, dump what’s left in the wheelbarrow in an open area and spread it out. — Eric Swartz
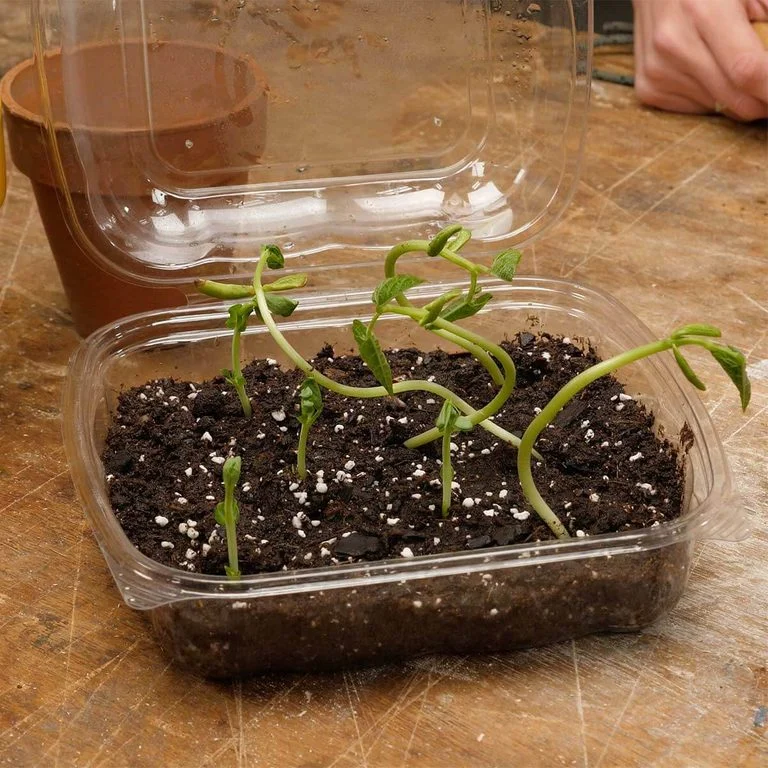
Greenhouse from the Salad Bar
The next time you hit up a salad bar for lunch, save the plastic clamshell container. It can be reused as a mini greenhouse for starting seeds in the spring. When you’re finished with your lunch, wash the container thoroughly. Use an awl and hammer to punch a few small holes in the top part of the container for airflow. Then fill the bottom half with potting mix or your own special seed-starting soil. Plant your seeds, spreading them out in the container as suggested on the seed packet. Give the seeds a small drink of water and close the lid. Place the container in a sunny spot, and patiently wait for your seeds to sprout!
The clear plastic container acts like a greenhouse, allowing the sun and warmth to reach the plants while holding in moisture
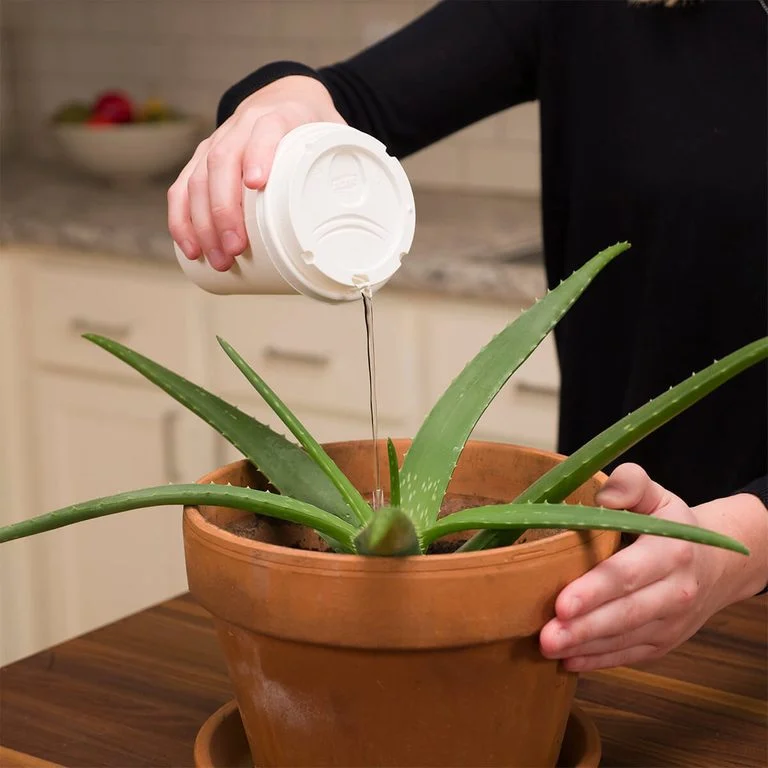
To-Go Coffee Cup to Water Plants
A clean to-go coffee cup with a lid makes an excellent watering can. The hole in the lid is the perfect size for pouring the water slowly, so you don’t overwater your plants. This quick watering can is especially useful for plants such as aloe vera and cacti that don’t require much water. Or for office plants, as clean to-go coffee cups with lids are usually readily available. Be sure to wash the cup and lid thoroughly before reusing it as a watering can.
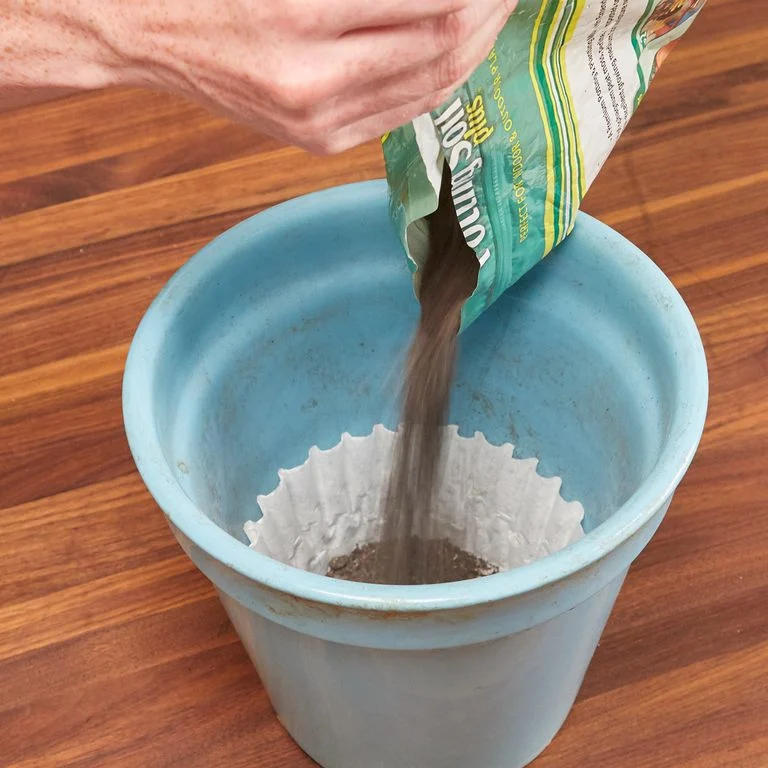
Coffee Filter Dirt Stopper
Every spring, I spend a lot of time adorning my deck with flowers. I love every part of it: potting the seedlings, daily watering and relaxing in my lounge chair relishing their beauty. But there’s one thing that drove me nuts. I used to have trouble keeping the dirt from flowing out the bottom of my potted plants when I watered them. I tried using larger stones in the bottoms of the pots, but that didn’t completely solve the problem.
The solution was to place a coffee filter at the bottom of the pot before filling with dirt. The coffee filter stops the dirt while still allowing the water to flow through and not waterlog the plant. Now I have solved one of my tiny pet peeves and can move on with my life! — Kevin Daniel
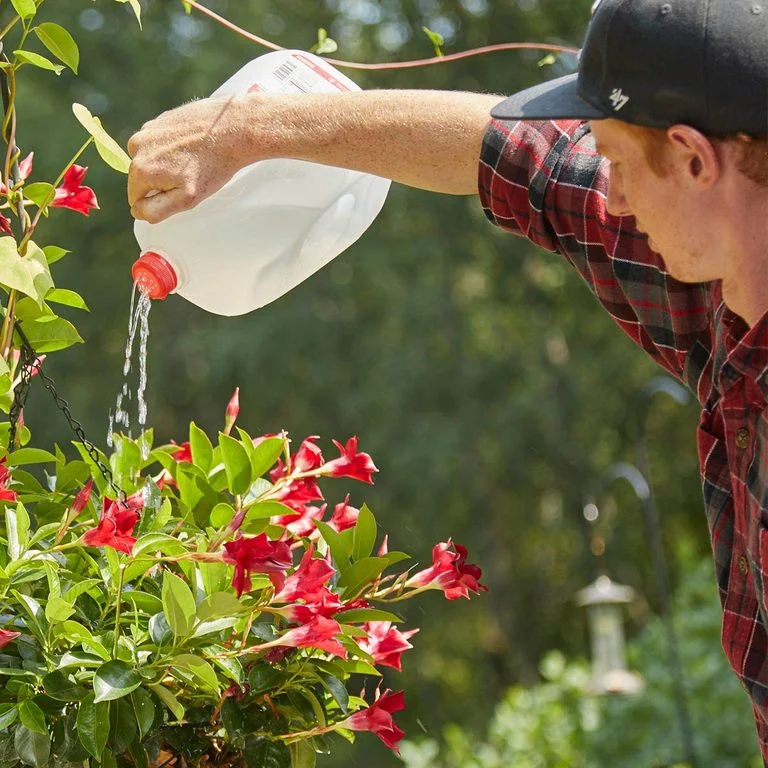
How to Turn an Empty Milk Jug Into a Watering Can
I only own one watering can, so I need to refill it four or five times to water all of the plants on my patio. Instead of buying more overpriced watering cans, I use old milk jugs. I drill a few holes in the caps, fill up the jugs with water and I’m good to go. — Harrison Berg
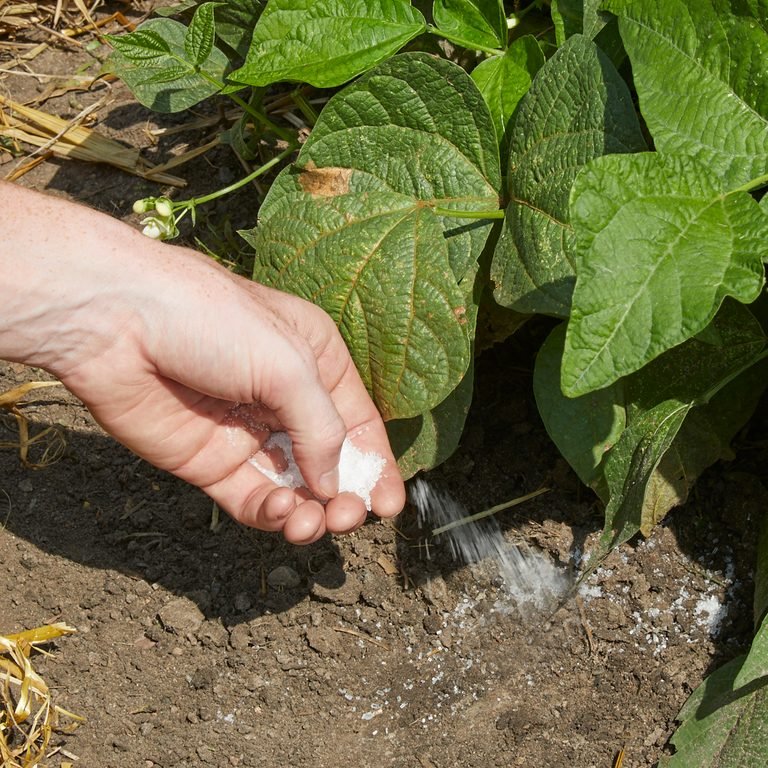
Epsom Salt Fertilizer Trick
Epsom salt (hydrated magnesium sulfate) is known for its home remedy uses, but the garden might be the place that it shines the most. Like store-bought fertilizers, Epsom salt contains magnesium, which aids in seed germination, chlorophyll production and absorption of vital nutrients like nitrogen and phosphorus.
Most plants grow better with a ratio of two teaspoons to one gallon of water per month. You can also dilute the Epsom salt with water in a bottle and apply as a foliar spray. Misting the plant greatly increases its growth. This works especially well on vegetables and roses. — Taylor Peterson
Penny Hoarder Issues “Urgent” Alert: 6 Companies Are Overcharging You
By The Penny Hoarder — How many times have we fallen for this?
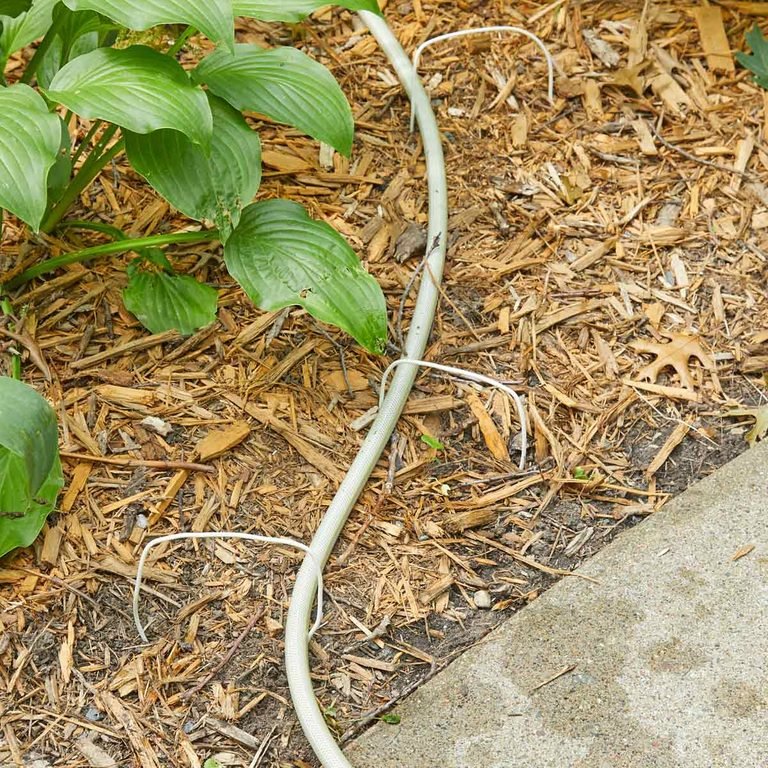
New Use for Old Backyard Game Pieces
We spend a ton of time planting, fertilizing and watering our flowers. Once, while dragging the hose across the yard, I inadvertently raked it across the garden and destroyed a bunch of flowers. My solution was to make a path for the hose using the wickets from my croquet set. As I’m watering, I feed the hose through the wickets, keeping my flowers safe. — Ryne Rover

Control Your Climbing Plants with Zip Ties
Getting my vines to run up just how I want tricky. To direct the vines, I fasten zip-ties around the stalks, strapping them to anything stable. Don’t strap the vines too tightly. They need to be able to move and grow. — Craig Sullivan
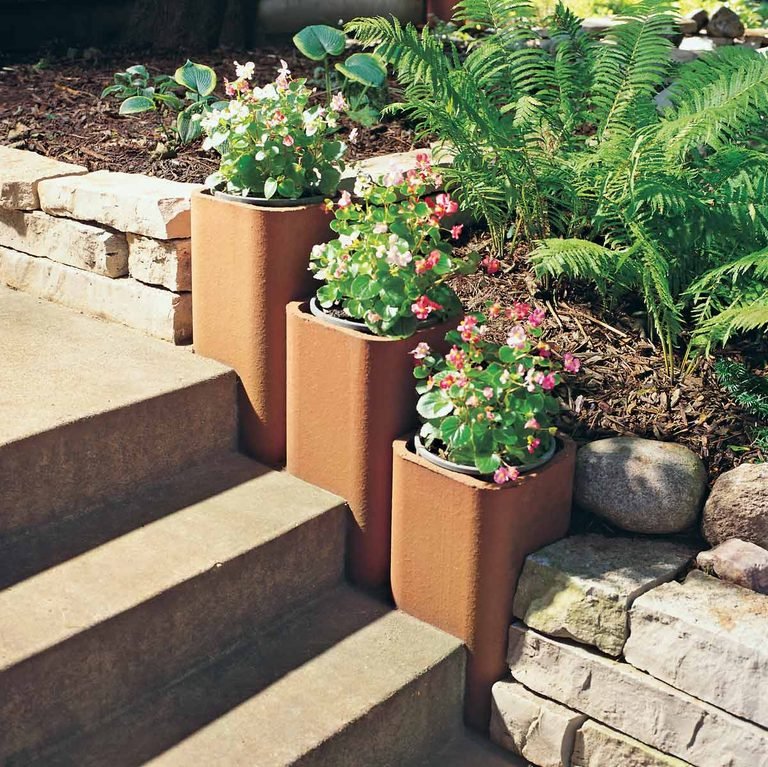
Chimney Flue Planters
To make these terra-cotta planters, go to a brick supplier and buy 3-ft. lengths of clay chimney flue liner. Cut them to different heights using a circular saw fitted with an abrasive cutting wheel. You can put them on a deck or patio, or accent your yard wherever you like—just pick your spots and bury the ends in the soil a little. Fill the liners with gravel for drainage, leaving 8 in. at the top for potting soil. Since the water can drain, the liners won’t crack if they freeze. Or just set pots on top of the gravel and bring in the plants for the winter. — Nancy Belmont
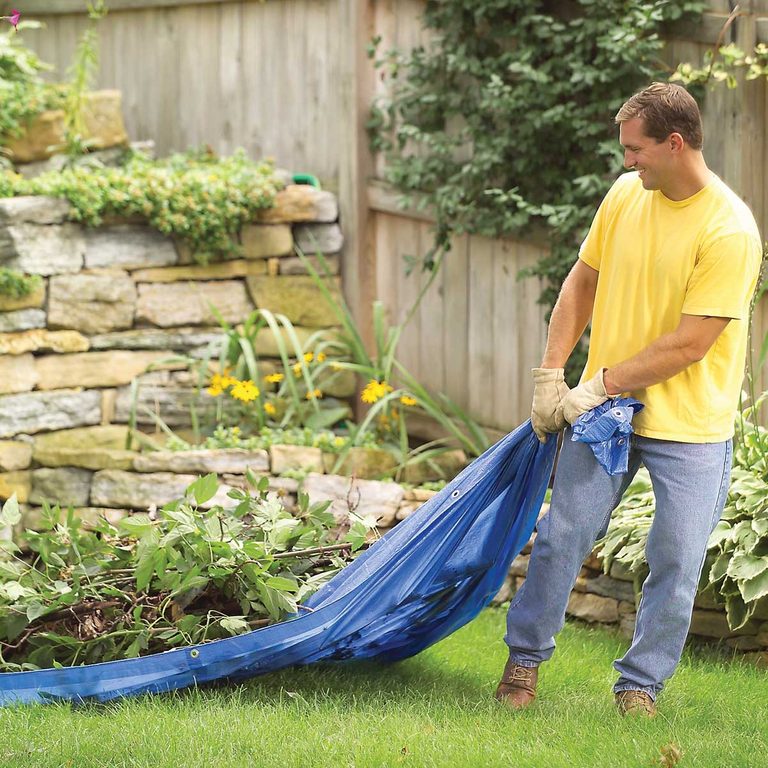
Invest in a Heavy-Duty Tarp
Nothing is quite so useful in landscaping projects as a durable tarp. It’s excellent for moving leaves, weeds, soil, and small rocks (among other materials) quickly and safely when working in the yard. You can also use it to cover plants or landscaping materials on a truck bed when transporting them or to protect projects from a fierce storm. Just don’t leave a tarp laying out on the lawn for too long, or it will kill your grass. Check out these pro lawn and garden tips.
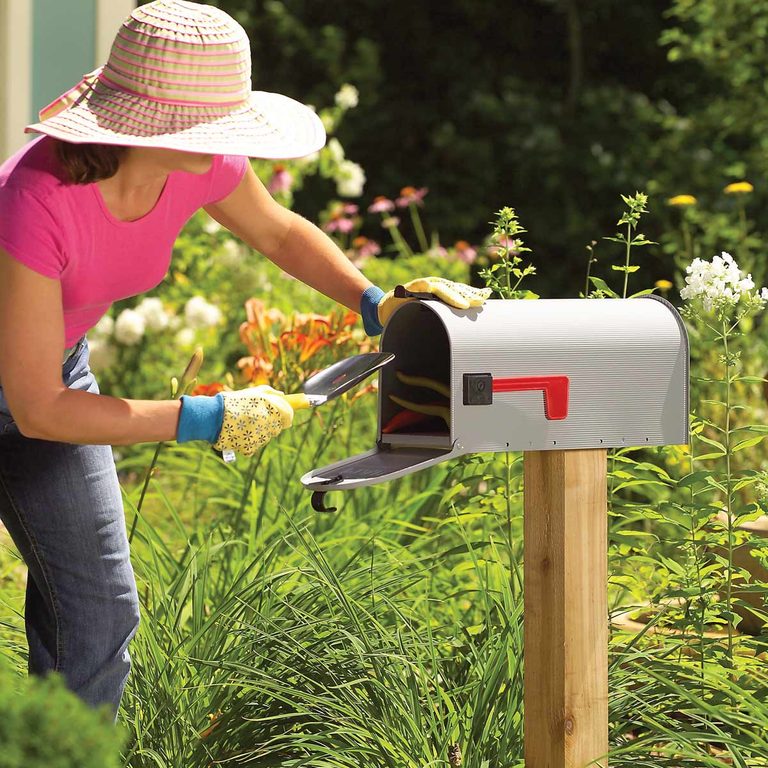
Garden Tool Hideaway
A mailbox hidden behind shrubs near your garden provides a convenient home for tools. A small mailbox like this one costs less than $20 at hardware stores and home centers. King-size models cost about $35. — Lynn Samples
DIYers tend to accumulate all kinds of tools for all kinds of projects. The key to staying efficient, though, is to make sure you always have the right tools at hand. Check out these 21 ideas to make sure you keep your tools organized.
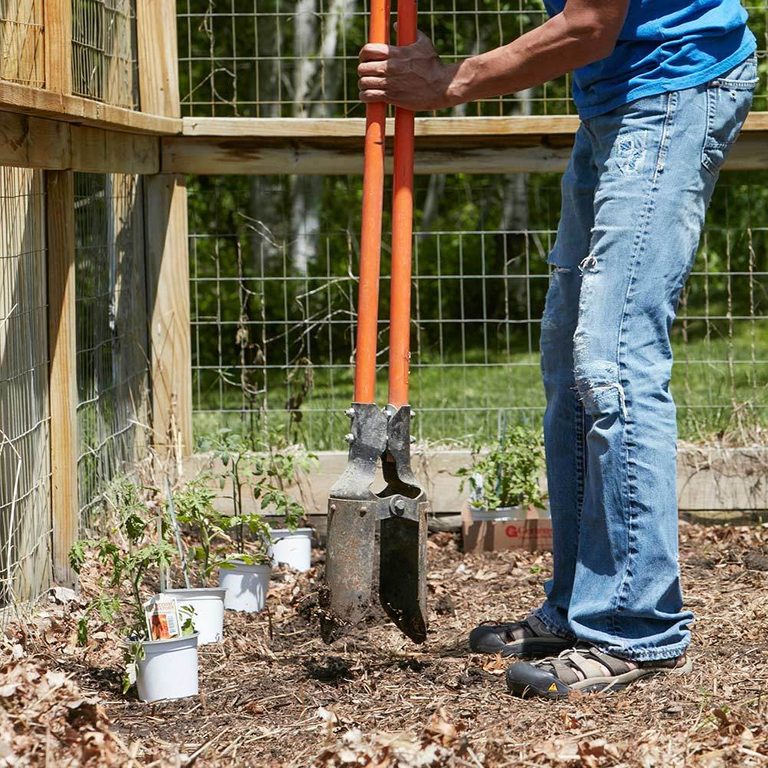
Easier Vegetable Planting
We have a really big vegetable garden and I’m getting older, so the less time I have to spend hunched over on my hands and knees, the better. When I’m ready to plant new vegetables, I set aside my trowel and grab my posthole digger. Just one or two plunges into the soil for each plant and I’ve got perfectly sized holes for all my crops! — Barbara McGrew
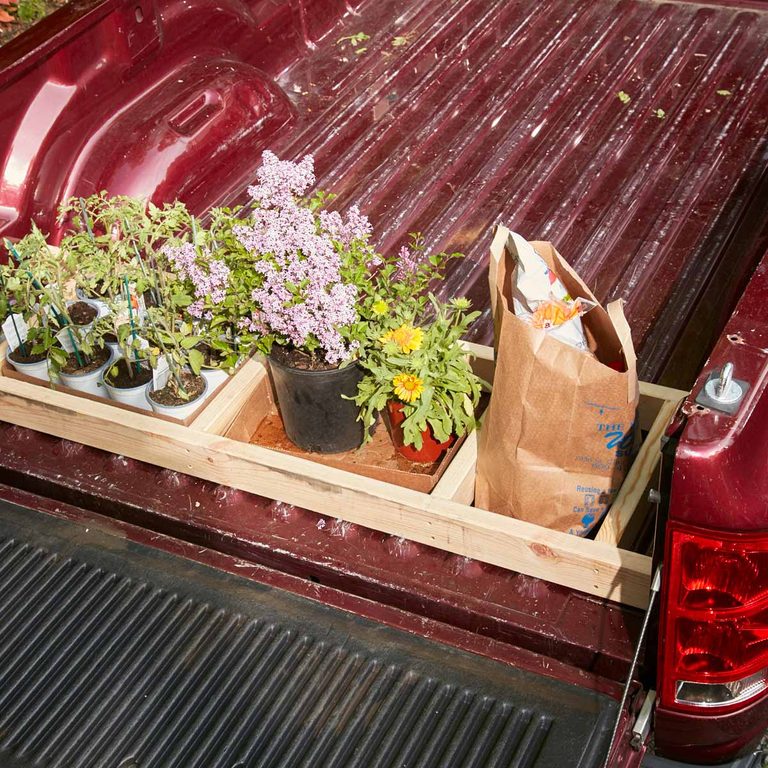
Truck-Bed Caddy
Pickup trucks are great for hauling big stuff, but small stuff has a way of sliding all over the place. To solve the problem, I made a simple caddy from 2x4s and fastened with deck screws. The compartments help small items like nursery plants stay put. — Tom Rawson

A Better Way to Replant
When I bring home new flowers or shrubs for my garden, I avoid yanking them out of their plastic pots by the stems because it can hurt the plants. Instead, I use a sharp knife to cut down two or more sides of each pot to free the plant, being careful not to tear the roots when separating the soil from the container. — Leslie Poehler
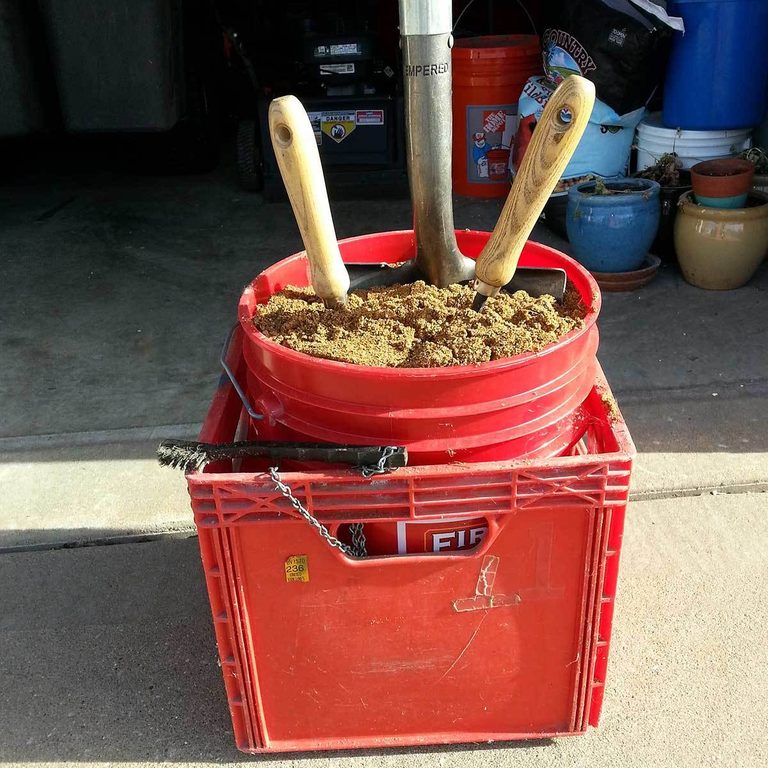
Use Mineral Oil and a Pot of Sand for Your Tools
This hack ensures your tools are always ready and clean. Find a pot or small bucket and fill it with clean sand. Take several of your most-used landscaping tools and stick them into the sand – they will stay upright and easy to grab this way. When finished for the day, spray your tools with a quick coat of mineral oil and put them back in the sand. Over time, the combination of mineral oil and sand will help clean your tools and keep them from going dull as fast.
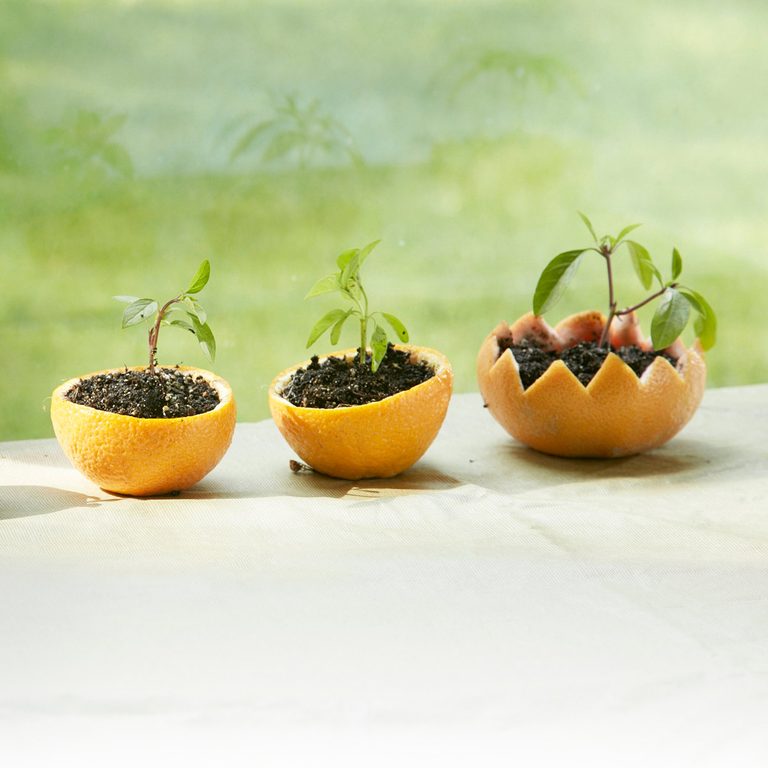
Citrus-Rind Seed Starters
Grapefruit, orange and other citrus rinds are just the right sizes for starting new seedlings. I make a hole in the bottom of each one for drainage and add some damp seed-starting mix and seeds. Then, when it’s time to move them outside, I plant the whole works in the ground— peels and all. The citrus rinds make the soil more acidic, however, so I only do this with acid-loving plants like radishes, peppers and the like. — Judy Wilder
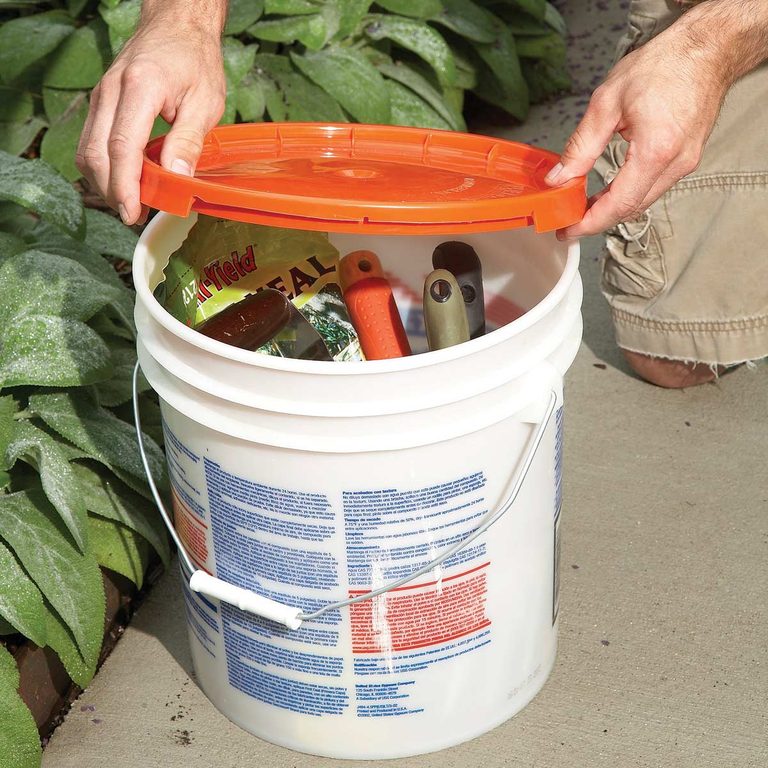
Tool Bucket
A 5-gallon bucket comes in handy out in the garden—and not just for collecting weeds. You can load it up with all your gardening tools and carry them easily from place to place. If it starts to rain, protect the tools with the lid. But here’s the best part—it doubles as a portable stool when you need to rest or do some pruning. The only problem is that the lid can be hard to pry off. Solve that by cutting off all but two of the plastic tabs. The lid will go on and off in a snap. — Julie Abbott